
Ever looked at a staircase and thought, "I could build that"? Well, you're in the right place. Building stairs might seem like a big job, but with a little patience and some basic tools, you'll be stepping up your DIY game in no time. This guide will walk you through everything, from understanding the parts of a stair to putting it all together. So grab your tools, and let's get started on how to build stairs step by step!
Key Takeaways
- Learn the essential parts of a staircase: stringers, treads, and risers.
- Proper planning is crucial for measuring and selecting materials.
- Accurate cutting and preparation of components ensure a sturdy build.
- Assemble your staircase carefully, focusing on secure attachments.
- Finish with safety features like handrails and non-slip surfaces.
Understanding the Basics of Stair Anatomy
Stringers: The Backbone of Stairs
Stringers are like the unsung heroes of your staircase. They’re the long, diagonal pieces that hold everything together, kind of like the spine of the stairs. Usually made from wood or metal, stringers are cut in a zigzag pattern to create slots for the treads and risers. Without sturdy stringers, your staircase would be nothing more than a pile of wood and nails. They’re essential for providing stability and support, ensuring that every step you take is safe and sound.
Treads: Where Feet Meet Stairs
Treads are the horizontal surfaces you step on as you climb the stairs. They need to be wide enough for your feet to land comfortably. Think about it: if the treads are too narrow, walking up the stairs becomes a balancing act. Typically, treads are made from durable materials that can handle a lot of foot traffic without wearing down too quickly. They’re the part of the stairs that see the most action, so they need to be tough.
Risers: The Vertical Elements
Risers are the vertical pieces that sit between each tread. They’re what give stairs their height. The height of each riser is crucial because it affects how comfortable the stairs are to climb. If the risers are too high, the stairs can be tiring to ascend. On the other hand, if they’re too low, you might find yourself tripping. Risers can be open or closed, depending on the design of the staircase. Closed risers give a more traditional look, while open risers can make the staircase feel lighter and more modern.
When you break it down, stairs might seem simple, but each part plays a crucial role in making sure they’re safe and easy to use. Understanding these basics is the first step in building a staircase that’s both functional and beautiful.
Planning Your Staircase Project
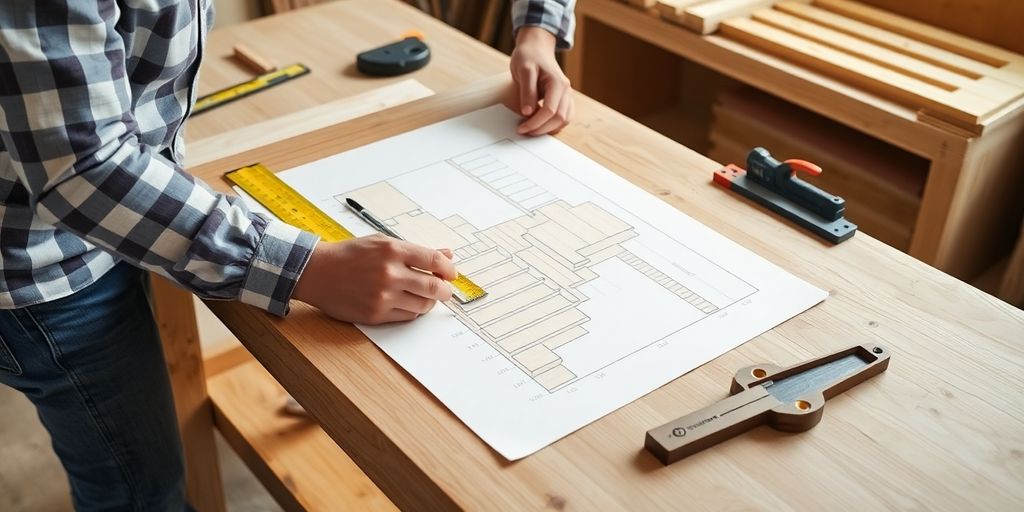
Measuring for Stair Installation
Before you start building, you've got to get your measurements right. Measure twice, cut once, as the saying goes. It's not just about height; you need to figure out the rise and run of each step. Grab a tape measure and a level, and get to work.
Here's a simple checklist to guide you:
- Measure the total height from the floor to the top of the landing.
- Calculate the number of steps you’ll need by dividing the total height by the desired riser height.
- Determine the run (depth) of each step to ensure comfort and safety.
Choosing the Right Materials
When it comes to picking materials, think about both strength and style. Wood is a classic choice, but metal and glass can add a modern twist. Consider how the material will look with the rest of your home.
Here's a quick comparison:
| Material | Pros | Cons |
|---|---|---|
| Wood | Warm, classic look | Can warp over time |
| Metal | Durable, modern | Can be noisy |
| Glass | Sleek, contemporary | Requires frequent cleaning |
Designing for Safety and Style
Safety and style go hand in hand when designing stairs. Make sure your design complies with local building codes. Think about the width of the stairs, the height of the risers, and the depth of the treads.
- Ensure handrails are at the correct height.
- Use non-slip materials on treads.
- Consider adding landings for longer staircases.
Designing your stairs is like setting the stage for a grand entrance. Get it right, and you'll have a masterpiece that combines function with flair.
For those interested in learning how to draw stairs on a floor plan, remember to select the appropriate stair type and sketch it accurately with all necessary annotations.
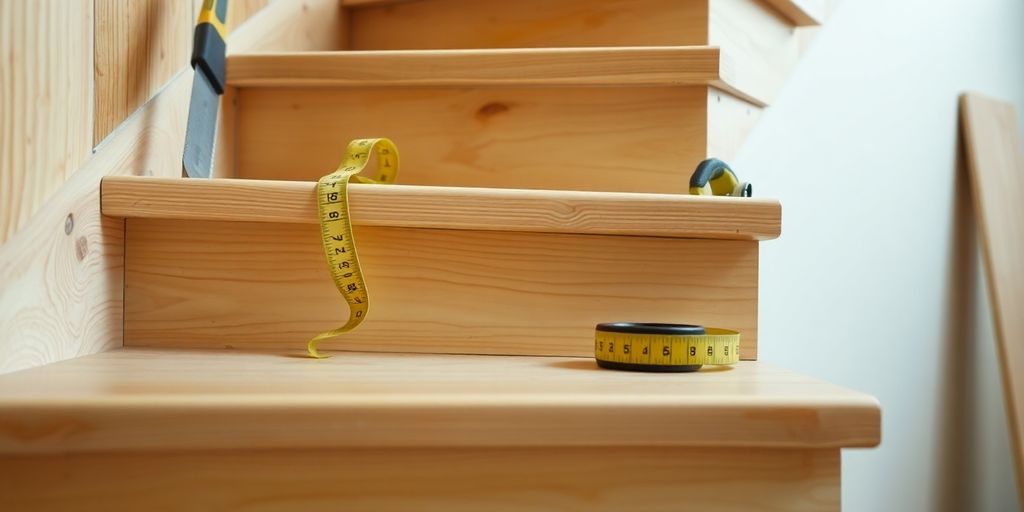
Cutting and Preparing Stair Components
Using a Stringer Calculator
Before you start cutting, you need to get your measurements right. A stringer calculator is your best friend here. It helps you figure out the rise and run of your stairs. You input your total rise (the height from the bottom to the top of the stairs) and your desired tread width and riser height. The calculator will then give you the exact length and angle for your stringers.
- Input total rise and desired dimensions.
- Get exact measurements for stringers.
- Avoid costly mistakes by double-checking your numbers.
Cutting Stringers Accurately
Once you have your measurements, it's time to transfer them to your lumber. Mark your stringers using a framing square and stair gauges to ensure precision. Start at one end of your board and work your way down, marking each tread and riser. Use a circular saw for most of the cuts, but you'll need a handsaw to finish off the corners for a clean cut. Remember, measure twice, cut once!
- Use a framing square for accuracy.
- Circular saw for straight cuts, handsaw for corners.
- Double-check your work to avoid errors.
Preparing Treads and Risers
With the stringers ready, it's time to cut your treads and risers. For treads, ensure they extend slightly beyond the riser for a comfortable step. Risers should fit snugly between the treads and stringers. Sand the edges to prevent splinters and ensure a smooth finish. If you're planning to paint or stain, now is a good time to do a preliminary coat.
- Cut treads with a slight overhang.
- Fit risers snugly between stringers.
- Sand edges and apply a preliminary finish.
Taking the time to prepare each component of your stairs with care will make the assembly process much smoother and result in a sturdy, beautiful staircase.
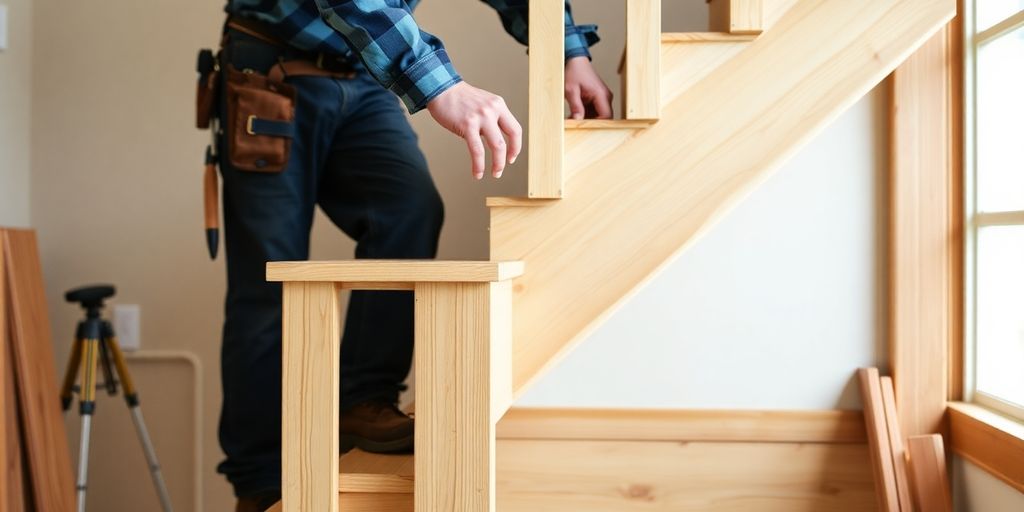
Assembling Your Stairs
Attaching Stringers to the Structure
Alright, you've got your stringers cut and ready. Now it's time to attach them to the structure. This step is crucial because the stringers are the backbone of your staircase. Start by securing the top of each stringer to the structure, ensuring they are level and equally spaced. Use metal hangers or brackets for extra support. If you're working on a two-story house with an open floor plan, this connection needs to be rock-solid to handle the traffic.
Securing Treads with Precision
With the stringers in place, it's time to add the treads. Each tread should be level and secure, so take your time here. Position each tread on the stringers, then fasten them with screws or nails. A spirit level is your best friend at this stage to ensure everything is even. Repeat this process for each step, and soon, you'll see your staircase taking shape.
Installing Risers for a Finished Look
Risers are the vertical parts between each tread, and they give your stairs a polished appearance. Cut each riser to fit snugly between the treads. If there are any gaps, use wooden shims to fill them. Secure the risers with screws or nails, making sure they align perfectly with the treads above and below. This step not only enhances the look of your stairs but also adds stability.
Assembling stairs is like putting together a giant puzzle. Each piece has its place, and when done right, it creates a sturdy and beautiful pathway from one level to the next. Take your time, measure twice, and enjoy the process. Your hard work will pay off with every step you take on your newly built stairs.
Finishing Touches for Your Staircase
Painting or Staining Your Stairs
Deciding whether to paint or stain your stairs can be a big deal. Paint gives your stairs a splash of color, while stain lets the natural wood shine through. If you're going for a modern look, paint might be your go-to. But if you love the rustic charm of wood, a nice stain can do wonders. Keep in mind, whatever you choose, make sure it protects the wood from wear and tear.
Installing Handrails Safely
Handrails aren't just there for looks; they're a must for safety. When picking out a handrail, think about height, durability, and how easy it is to install. You want something sturdy, so look for materials like metal or hardwood. Make sure it fits within the safety guidelines, like those from the International Building Code. If you're not feeling up to the task, pre-made railings can save you a lot of hassle, and they often come with all the hardware you need.
Adding Non-Slip Features
Safety first, right? Adding non-slip features to your stairs is a smart move, especially if you have kids or older folks around. You can use adhesive strips, non-slip mats, or even a special non-slip coating. These little touches can make a big difference in preventing falls.
Common Mistakes to Avoid When Building Stairs
Ignoring Building Codes
One of the biggest blunders you can make when constructing stairs is neglecting to adhere to local building codes. These regulations ensure safety and uniformity, and skipping them can lead to costly repairs or even dangerous situations. Every step of your staircase should be consistent in size, both in terms of rise and run. Uneven steps can become tripping hazards, especially in dim lighting. Always check with a building inspector to ensure your plans meet the necessary requirements.
Inaccurate Measurements
Precision is key when building stairs. Miscalculations can lead to steps that are too steep or too shallow, making them uncomfortable or unsafe to use. Here are some tips to avoid measurement mishaps:
- Double-check all measurements before cutting.
- Use a stringer calculator to determine the correct rise and run for each step.
- Ensure that the total rise is evenly divided among all steps.
Using Inappropriate Materials
Choosing the wrong materials can compromise the structural integrity and aesthetic of your staircase. While wood is a popular choice for its classic look and durability, it’s essential to select a type that suits your environment and design preferences. For instance, hardwoods like oak or maple are excellent for indoor stairs, while treated lumber is better suited for outdoor use. Consider the following when selecting materials:
- Match the material to the style of your home.
- Ensure the material is durable enough to withstand regular use.
- Factor in maintenance requirements and costs.
Building a staircase is more than just a DIY project; it's about creating a safe and functional piece of your home. Take the time to plan thoroughly, measure accurately, and choose materials wisely to avoid these common pitfalls. Discover the top five mistakes to avoid when designing a new staircase, focusing on balancing style, safety, and functionality to achieve the ideal design for your home.
Tools and Supplies Needed for Stair Building
Essential Tools for the Job
Building stairs might seem daunting, but with the right tools, it becomes way more manageable. Here's a list of must-have tools:
- Measuring Tape: Accurate measurements are vital to ensure each step is uniform and safe.
- Level: Keeps everything balanced and even, from stringers to treads.
- Saw: A circular saw or jigsaw is essential for cutting stringers and treads to the correct size.
- Drill: Necessary for securing treads and risers to the stringers.
These are the basic tools you'll need, but depending on your specific project, additional tools might come in handy.
Choosing the Right Wood
Picking the right wood is crucial for both the look and durability of your stairs. Here are some tips:
- Hardwood: Offers a classic look and is highly durable. Ideal for indoor stairs.
- Pressure-treated wood: Perfect for outdoor stairs due to its resistance to moisture and insects.
- Plywood: Often used for risers and less visible parts due to its affordability.
When selecting wood, consider the environment where the stairs will be installed to ensure longevity.
Fasteners and Hardware
Fasteners and hardware hold your staircase together, so choosing the right ones is key:
- Screws: Generally preferred over nails for their superior holding power.
- Nails: Can be used for attaching treads and risers, but ensure they're the right size.
- Brackets: Provide extra support and stability, especially at the joints.
Having the right hardware on hand can make the difference between a sturdy staircase and one that feels like it might fall apart.
By gathering these tools and supplies, you'll be well-prepared to tackle your stair-building project with confidence. For more details on using these tools, especially for building floating wood stairs, make sure to measure precisely and cut your materials to the correct size.
When building stairs, having the right tools and materials is key to success. You’ll need items like a saw, hammer, measuring tape, and wood. These supplies help ensure your stairs are safe and sturdy. For more tips and a complete list of what you need, visit our website!
Wrapping It Up
Building stairs might seem like a daunting task at first, but with the right guidance and patience, it's totally doable. We've walked through the basics, from understanding the components like stringers and treads to the actual construction process. Remember, the key is in the planning—measure twice, cut once, as they say. Whether you're using wood, metal, or something else, make sure your materials are sturdy and safe. And don't forget to check local building codes to ensure everything's up to snuff. So, grab your tools, take your time, and soon enough, you'll have a staircase you can be proud of. Happy building!
Frequently Asked Questions
What are the main parts of a staircase?
The main parts of a staircase are the stringers, treads, and risers. Stringers are the sloped boards that support the stairs, treads are the flat steps you walk on, and risers are the vertical parts between each tread.
How do I measure for a staircase?
To measure for a staircase, you need to determine the total rise (height from the bottom to the top), the total run (horizontal distance), and the width of the stairs. These measurements help you calculate the number of steps and the size of each step.
What materials are best for building stairs?
Wood is a popular choice for indoor stairs because it's strong and looks nice. For outdoor stairs, treated wood, metal, or concrete are good options as they withstand weather better.
Why is it important to follow building codes when building stairs?
Building codes ensure that stairs are safe to use. They specify details like step height and depth, handrail requirements, and other safety features to prevent accidents.
How can I make my stairs safer?
To make stairs safer, you can add handrails, use non-slip treads, and ensure that each step is the same height and depth. Proper lighting also helps in preventing falls.
What tools do I need to build a staircase?
Basic tools for building stairs include a saw for cutting wood, a tape measure for accurate measurements, a level to ensure steps are even, and a drill or hammer for securing parts together.
Postar um comentário